Pages

Showing posts with label DIY. Show all posts

Monday, February 16, 2015

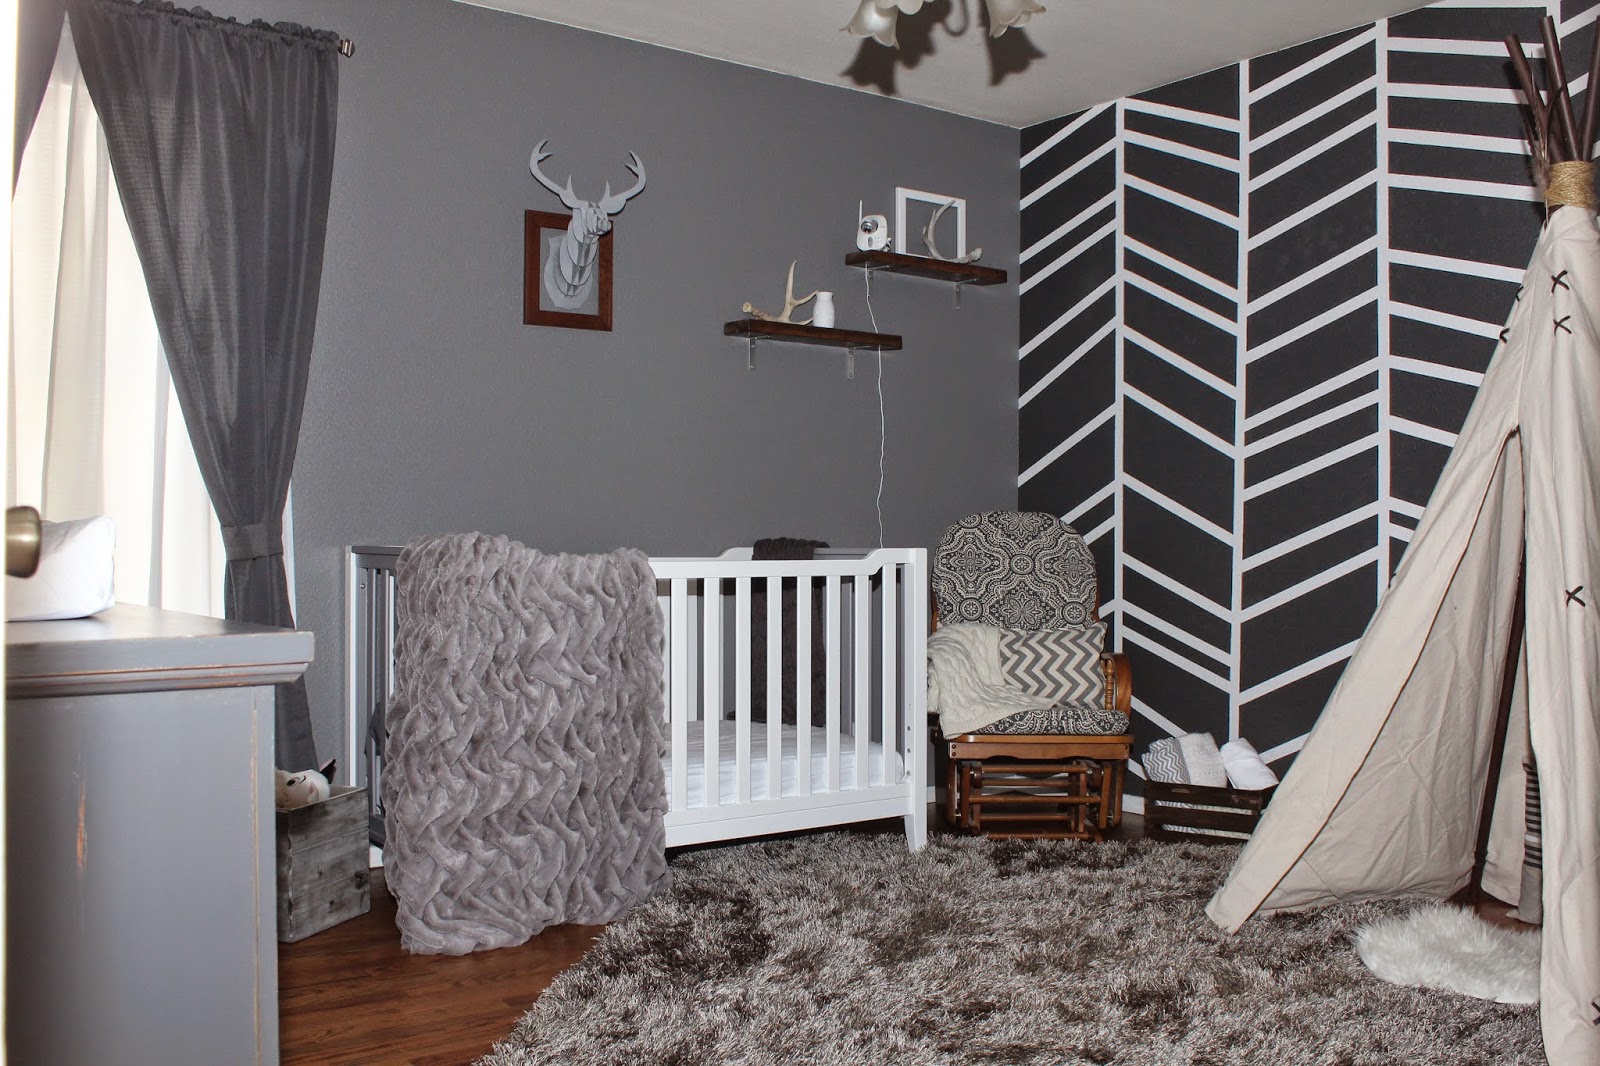
Baby Boy Nursery...aka Little Man Cave

I get to make a baby BOY nursery, can you believe it?!?! :) It started off a little stressful as hubby and I didn't have the same decorating/theme ideas, but eventually I figured out what I wanted to do and tried to keep him involved in all the projects. This became my big to-do over Christmas break.
We moved Berkley and her crib into the big girls' room and I was able to get most of the walls painted. I received a new crib for Christmas so we set that up in the nursery and now Berkley goes back and forth between the two rooms depending on the sleep needs of everyone else in the family. Soooo, she's been spending most of her sleeps in the nursery. (We did build her a murphy bed to sleep in once she outgrows her crib, which will take up very little room in the shared girls' room, but that's a post for another time.)

It all started with this rug...I knew it was the foundational piece I wanted to base every thing off of. It's from atHome (the old Garden Ridge store.) I had to sell almost everything from the old girlie yellow cottage chic nursery to be able to buy this faux fur beauty.
 Then came some pillows from West Elm and some paint swatches...
 Medium gray paint on 3 walls...
 Accent wall would be dark gray with white stripes.
I purchased a perfect, long dresser off of Craigslist and refinished it. (It may just be my favorite piece I've ever done!)


I also wanted some shelving and LOVED the look of floating wood shelves but they were hundreds of dollars! We had some wood leftover from building the garage shelves so we cut them to size and I banged them up real good and stained them til they were as dark as I wanted.


Hubby helped me build a teepee...I painted pvc poles brown and the fabric is a canvas drop cloth which we attached to the poles with leather strips.
 Berkley approves the teepee! :)

 Got to have pillows and a sheepskin rug in there!
So here's the rest of the room...my 'little man cave'...


 My dad bought me several gorgeous faux fur type blankets that I'm obsessed with!
 And the crib came two-toned colored which was perfect!
 I finally finished reupholstering the rocking chair today...again, Berkley approves. :)

 We used some leftover fence wood from our backyard to make a wall piece for above the dresser/changing station.


 The little collage wall and storage/seating...


There's still 3 or so more things on my to-do list before the room is totally complete, but I wanted to document it before we get any closer to his arrival. We are so excited for our little man to join the family!!


Sunday, January 6, 2013

Laundry Room Done!

Huge check off my list today...the laundry room is 'done'! That leaves us with only the master bed left to 'makeover'. It all came together when dad gave me a Lowe's gift card for Christmas...Len drafted how he was going to build me custom-depth, very tall cabinets then bought the lumber and went to his gpa's workshop and together they built the cabinets. We borrowed some muscles from the neighbors to get it hoisted up there. I'm so glad Len was able to get them made and up before he left for the weekend so I had another 'surprise' project to work on, which is my tradition when he is out of town.  :)

Before: We took out the nasty single shelf:


I loved the color of the door in my big painting. I don't have much blue anywhere in my house, but decided I wanted to base this room off that color. I paired the muted turquoise with orange, champagne, and white. Oh I LOVE my new laundry room!!!! Ekk!! :)  Some pics:


I lightly distressed the cabinets to reveal the pretty wood hue. I still need to play around with some nick-nacs to see what I really want to keep in there. I also plan on doing something more on the opposite wall...for now it has a foam board to hold Ry's artwork.


 Now I need to find some laundry to do....!

Wednesday, October 24, 2012

A little paint...a big impact! And some other things...

The stairs BEFORE:

The stairs AFTER:

I LOVE it!!! It is so much brighter and cleaner! The white makes the wood look even more beautiful. Two products that rocked this project were:
Guardsman Wood Marker (comes in 3 colors-I used the lightest color) and Bic Wite-Out EZCorrect
The roll-on white out was PERFECT for covering the hundreds of finishing nail holes and some rust spots that soaked through the primer. The marker, which is made to fill in scuffs in wood, was so easy to use and it covered all the scratches on the steps and they look so good now!

I also worked on curtains...I took the 2 long panels from the living room and turned them into 3 valances in the kitchen nook and 2 valances in the living room.
 This nook SO needed some valances!
 Living room window where the long panels used to hang...now high valances. Look so much better!

 I just love this fabric!
All fabric I had on hand, in the form of other curtains. I purchased some wood and L brackets to mount the valances to in the kitchen nook. Some other things I used: sewing machine, rope (to make the piping on top), hot glue gun (to keep the 'pressed' edges looking pressed), staple gun, metal drill bit, and wood screws.

One last super easy thing I made with an empty frame I had:
A memo board for "up-and-coming" events or special items to display. Used: bendable thick wire (that came with a flower bouquet I got) and some adhesive to glue it to the frame. Easy peasy. :)